> ## Documentation Index
> Fetch the complete documentation index at: https://docs.vanna.finance/llms.txt
> Use this file to discover all available pages before exploring further.
# Lite Mode
> Lite Mode is Vanna's simplified one-click leveraged yield strategy - deposit collateral, borrow, and deploy into a yield pool in a single transaction.
Lite Mode is Vanna's simplified **one-click leveraged yield strategy**. It automates the complete flow - deposit collateral, borrow undercollateralized credit from Vanna, and deploy both into a yield pool - in a single transaction.
Switch between Lite and Pro using the **Pro / Lite** toggle in the top navigation bar.
In Pro Mode you perform the same steps manually across the Margin and Farm sections. Lite Mode handles everything automatically.
## Two tabs
Lite Mode has two tabs:
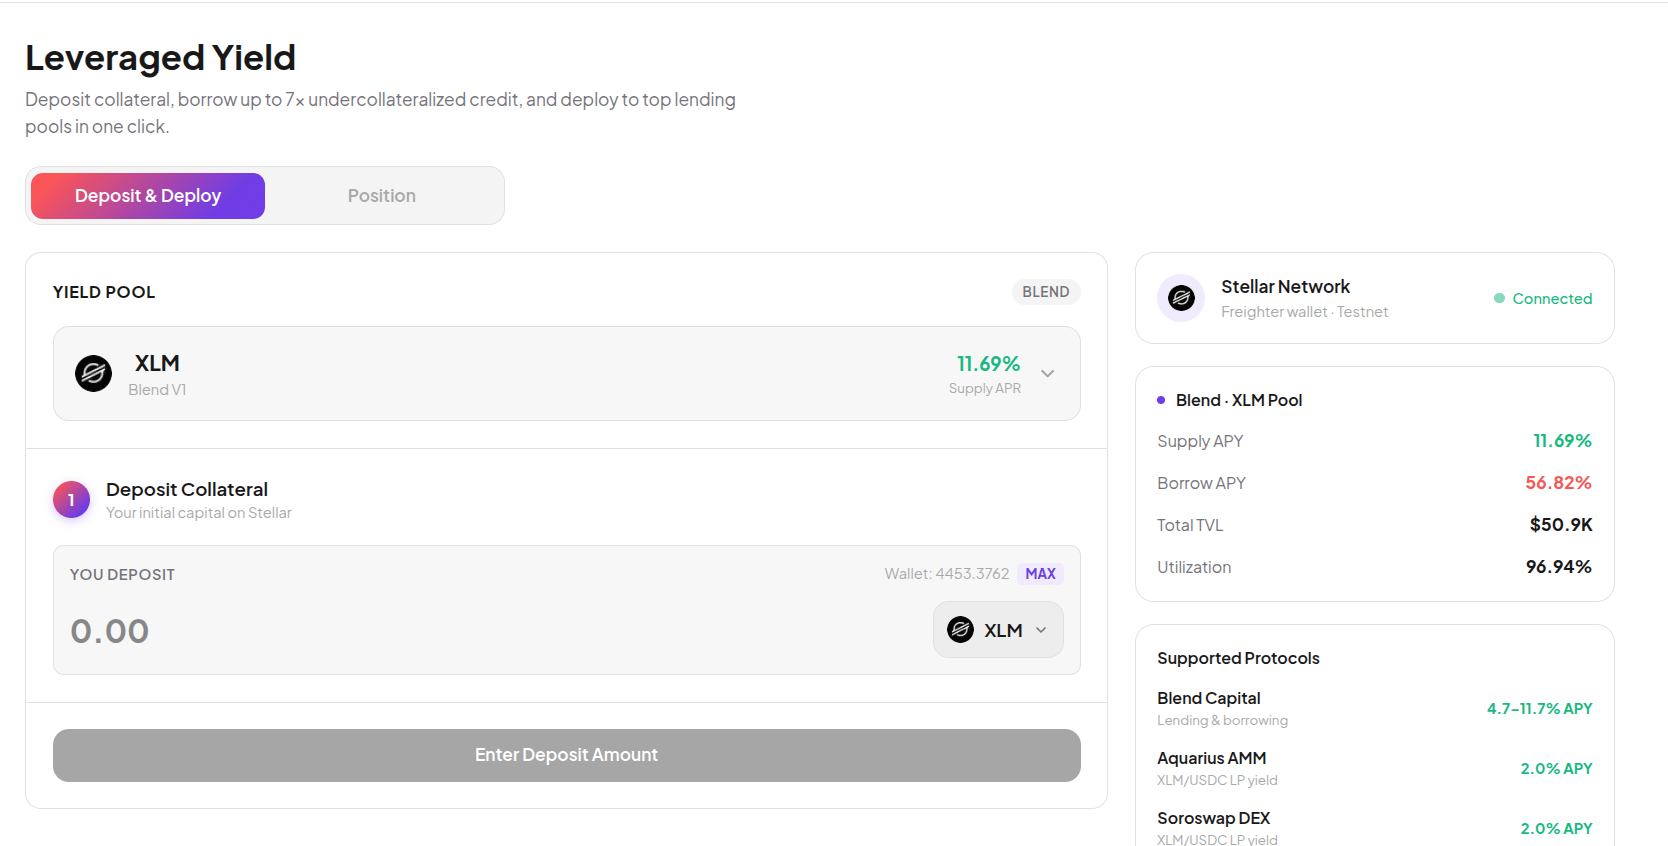
* **Deposit & Deploy** - open new leveraged yield positions
* **Position** - view and manage your open positions
## How to open a position
Click the **Pro / Lite** toggle in the top navigation and select **Lite**.
Choose the pool you want to deploy into. Each pool card shows its current Supply APR. The right panel shows live pool statistics - Supply APY, Borrow APY, Total TVL, and Utilization.
Enter the amount and asset you want to deposit as collateral. The interface shows your wallet balance and the USD equivalent in real time.
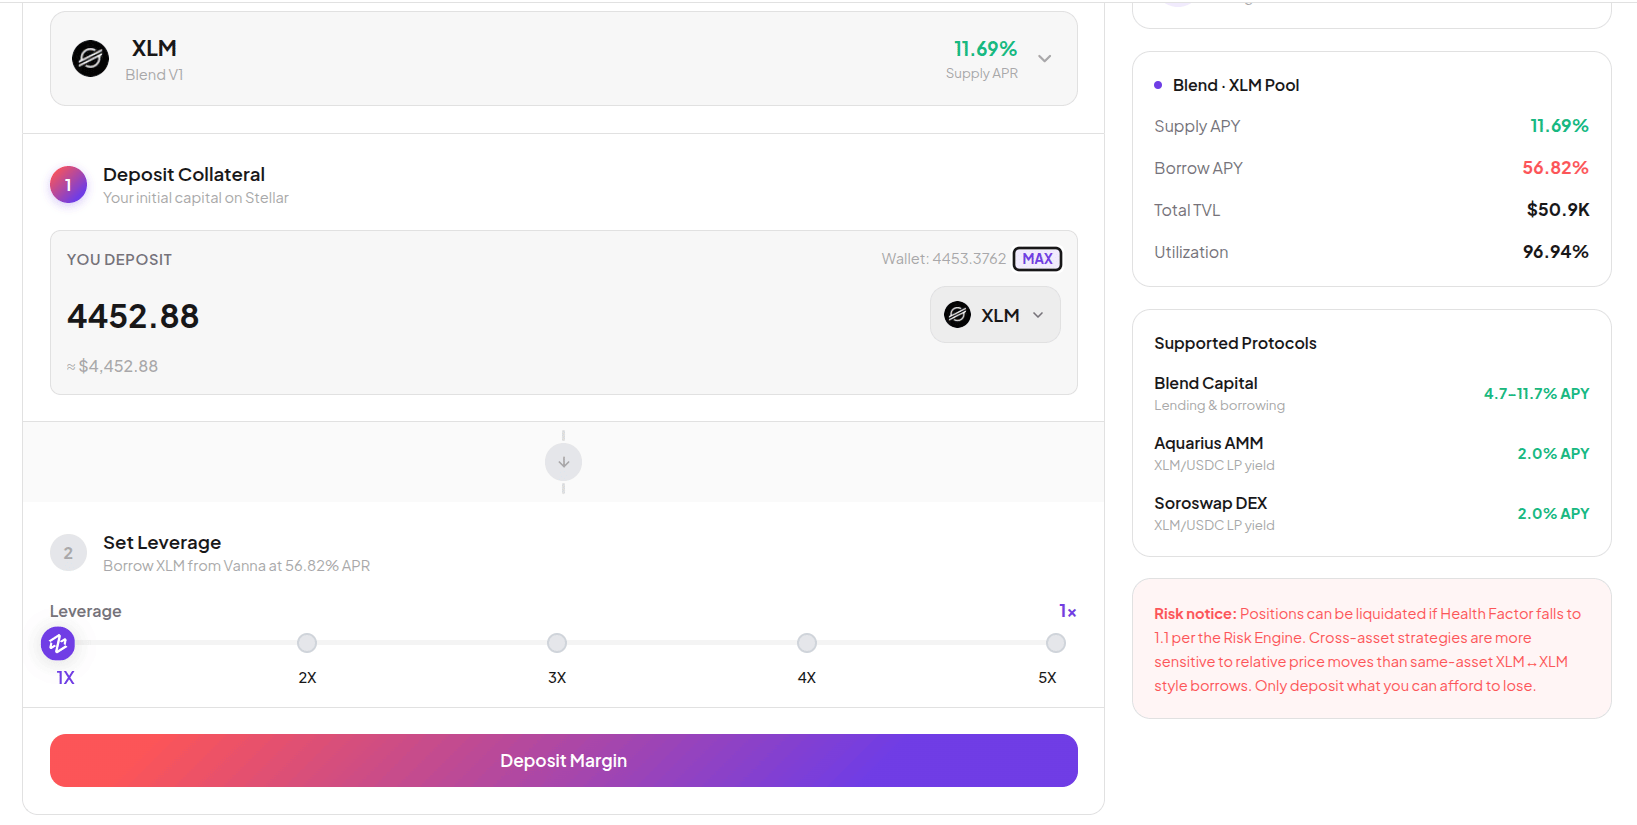
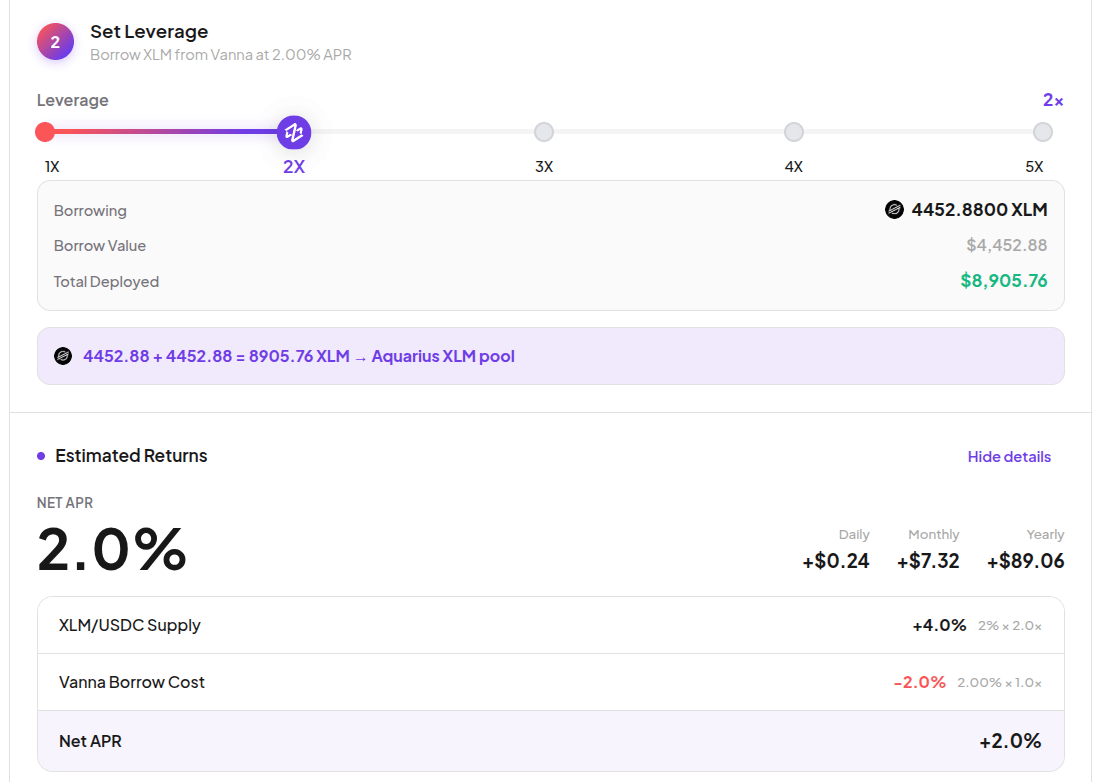
Use the leverage slider to set how much to borrow on top of your collateral. The interface shows exactly what will be borrowed, the total amount deployed, and the deployment route.
At **1× leverage** no borrowing occurs - only your deposited capital is deployed. The button shows **Deposit Margin**.
At **higher leverage**, the interface shows the **Estimated Returns** section with:
* **Net APR** - your yield after borrow cost (daily, monthly, yearly)
* Full breakdown: Pool Supply APR × leverage minus Vanna Borrow Cost
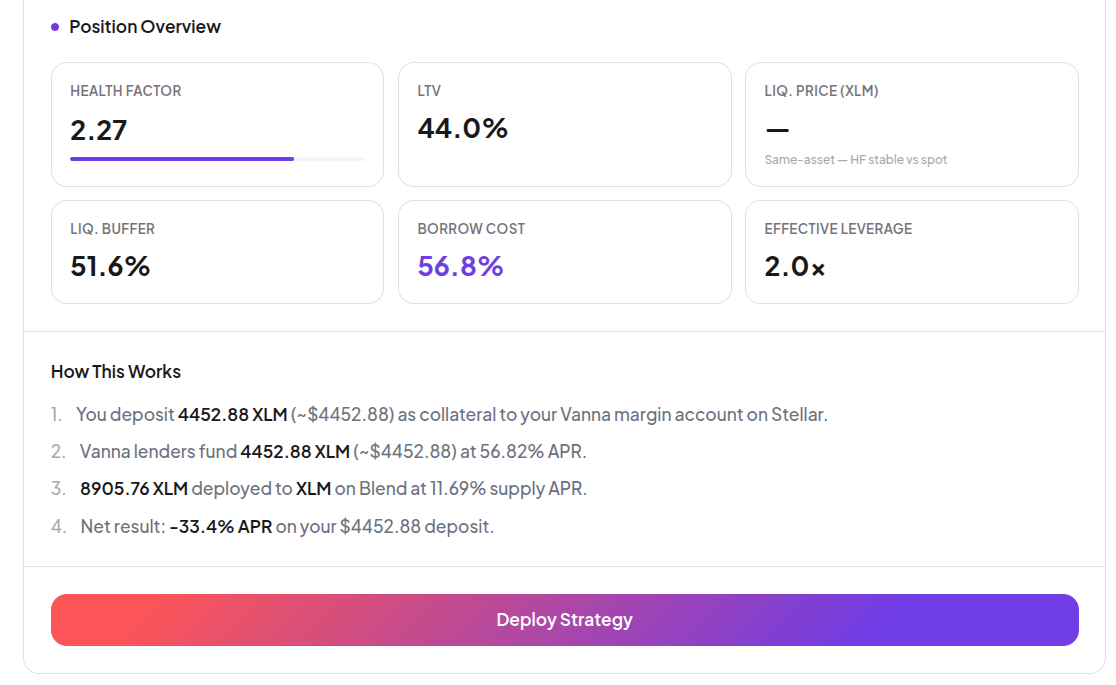
Before deploying, review the **Position Overview** metrics:
| Metric | What it means |
| ---------------------- | ------------------------------------------------------------------ |
| **Health Factor** | Must stay above 1.1× to avoid liquidation. Aim for 1.5× or higher. |
| **LTV** | Debt as a percentage of your total assets. |
| **Liq. Buffer** | How much room you have before reaching the liquidation threshold. |
| **Borrow Cost** | The APR you pay for the borrowed capital. |
| **Effective Leverage** | Your actual leverage multiplier. |
The **How This Works** section explains the exact flow - what gets deposited, what gets borrowed, and the final net result.
Click **Deploy Strategy** and approve the transaction in your wallet. The protocol deposits your collateral, borrows the required amount, and deploys both to the yield pool in a single transaction.
## Managing your position
Go to the **Position** tab to see all open positions. Each row shows Pool, Collateral, Borrowed, Net APR, Earnings to date, and Health Factor status.
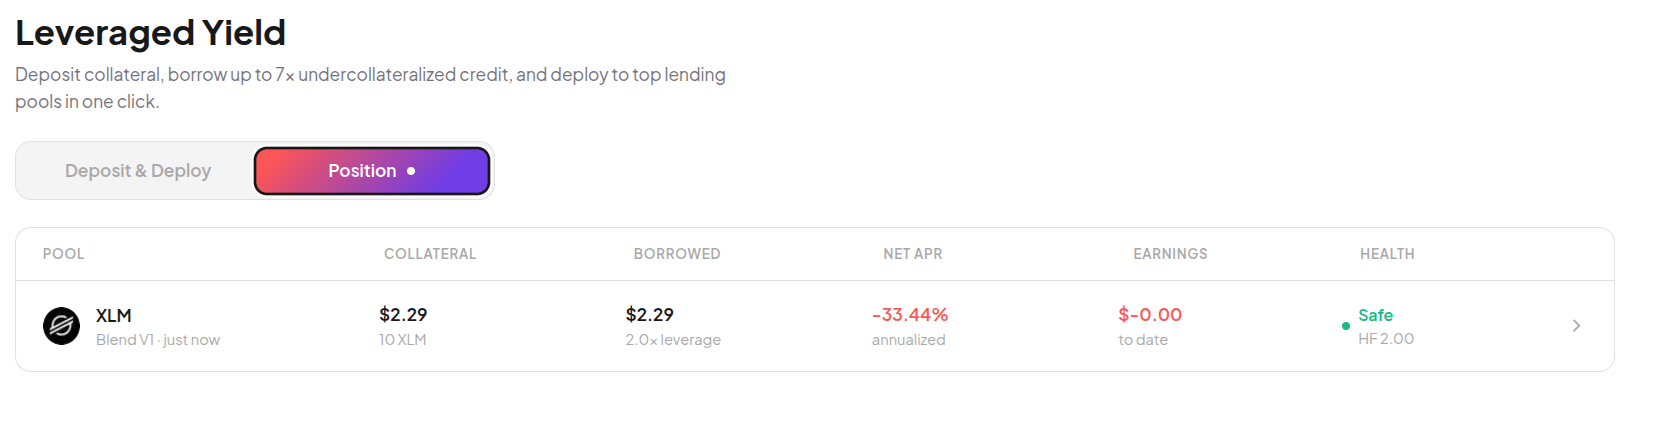
Health Factor is color-coded:
* 🟢 **Safe** - HF ≥ 1.5
* 🟠 **At Risk** - HF between 1.1 and 1.5
* 🔴 **Liquidation** - HF below 1.1
Click any position to view full details and manage it.
## Exiting a position
In the position detail view, choose how much to exit:
* **Partial exit (25% / 50% / 75%)** - repays and withdraws proportionally. Health Factor stays unchanged.
* **Full exit (100%)** - closes all debt and returns all collateral in one transaction.
Leveraged yield amplifies both returns and risk. If your Health Factor falls below 1.1×, your position can be liquidated. Monitor your Health Factor regularly, especially at high leverage.
## Related
* [Health Factor](/guides/margin/health-factor)
* [Liquidation](/guides/margin/liquidation)
* [Farm Overview](/guides/farm/overview)
* [For Traders](/guides/for-traders)